K8S 入门
Kubernetes就是一个生产级别的容器编排平台和集群管理系统,不仅能够创建、调度容器,还能够监控,管理服务器,它凝聚了
minikube
K8S一般都是运行在大规模的计算集群上,管理很严格,对个人来说比较有障碍,所以有一些实际的操作环境好学好用。
在官网它提供了 https://kubernetes.io/zh/docs/tasks/tools/
几个安装工具,初学入门推荐的有kind和minikube,他们都可以在本机上运行完整的K8S环境。
kind 基于 Docker,意思是“Kubernetes in Docker”。它功能少,用法简单,也因此运行速度快,容易上手。不过它缺少很多 Kubernetes 的标准功能,例如仪表盘、网络插件,也很难定制化,所以我认为它比较适合有经验的 Kubernetes 用户做快速开发测试,不太适合学习研究。不选 kind 还有一个原因,它的名字与 Kubernetes YAML 配置里的字段 kind 重名,会对初学者造成误解,干扰学习。再来看 minikube,从名字就能够看出来,它是一个“迷你”版本的 Kubernetes,自从 2016 年发布以来一直在积极地开发维护,紧跟 Kubernetes 的版本更新,同时也兼容较旧的版本(最多只到之前的 6 个小版本)。minikube 最大特点就是“小而美”,可执行文件仅有不到 100MB,运行镜像也不过 1GB,但就在这么小的空间里却集成了 Kubernetes 的绝大多数功能特性,不仅有核心的容器编排功能,还有丰富的插件,例如 Dashboard、GPU、Ingress、Istio、Kong、Registry 等等,综合来看非常完善。
搭建 minikube 环境
官网地址:https://minikube.sigs.k8s.io/docs/
我们选择使用minikube 的最新版本是 1.25.2,支持的 Kubernetes 版本是 1.23.3。
提示
需要注意一下本机电脑的硬件架构,Intel芯片要选择带amd64后缀,Apple M1芯片要选择arm64后缀,选错了就会因为CPU指令不同而无法运行。
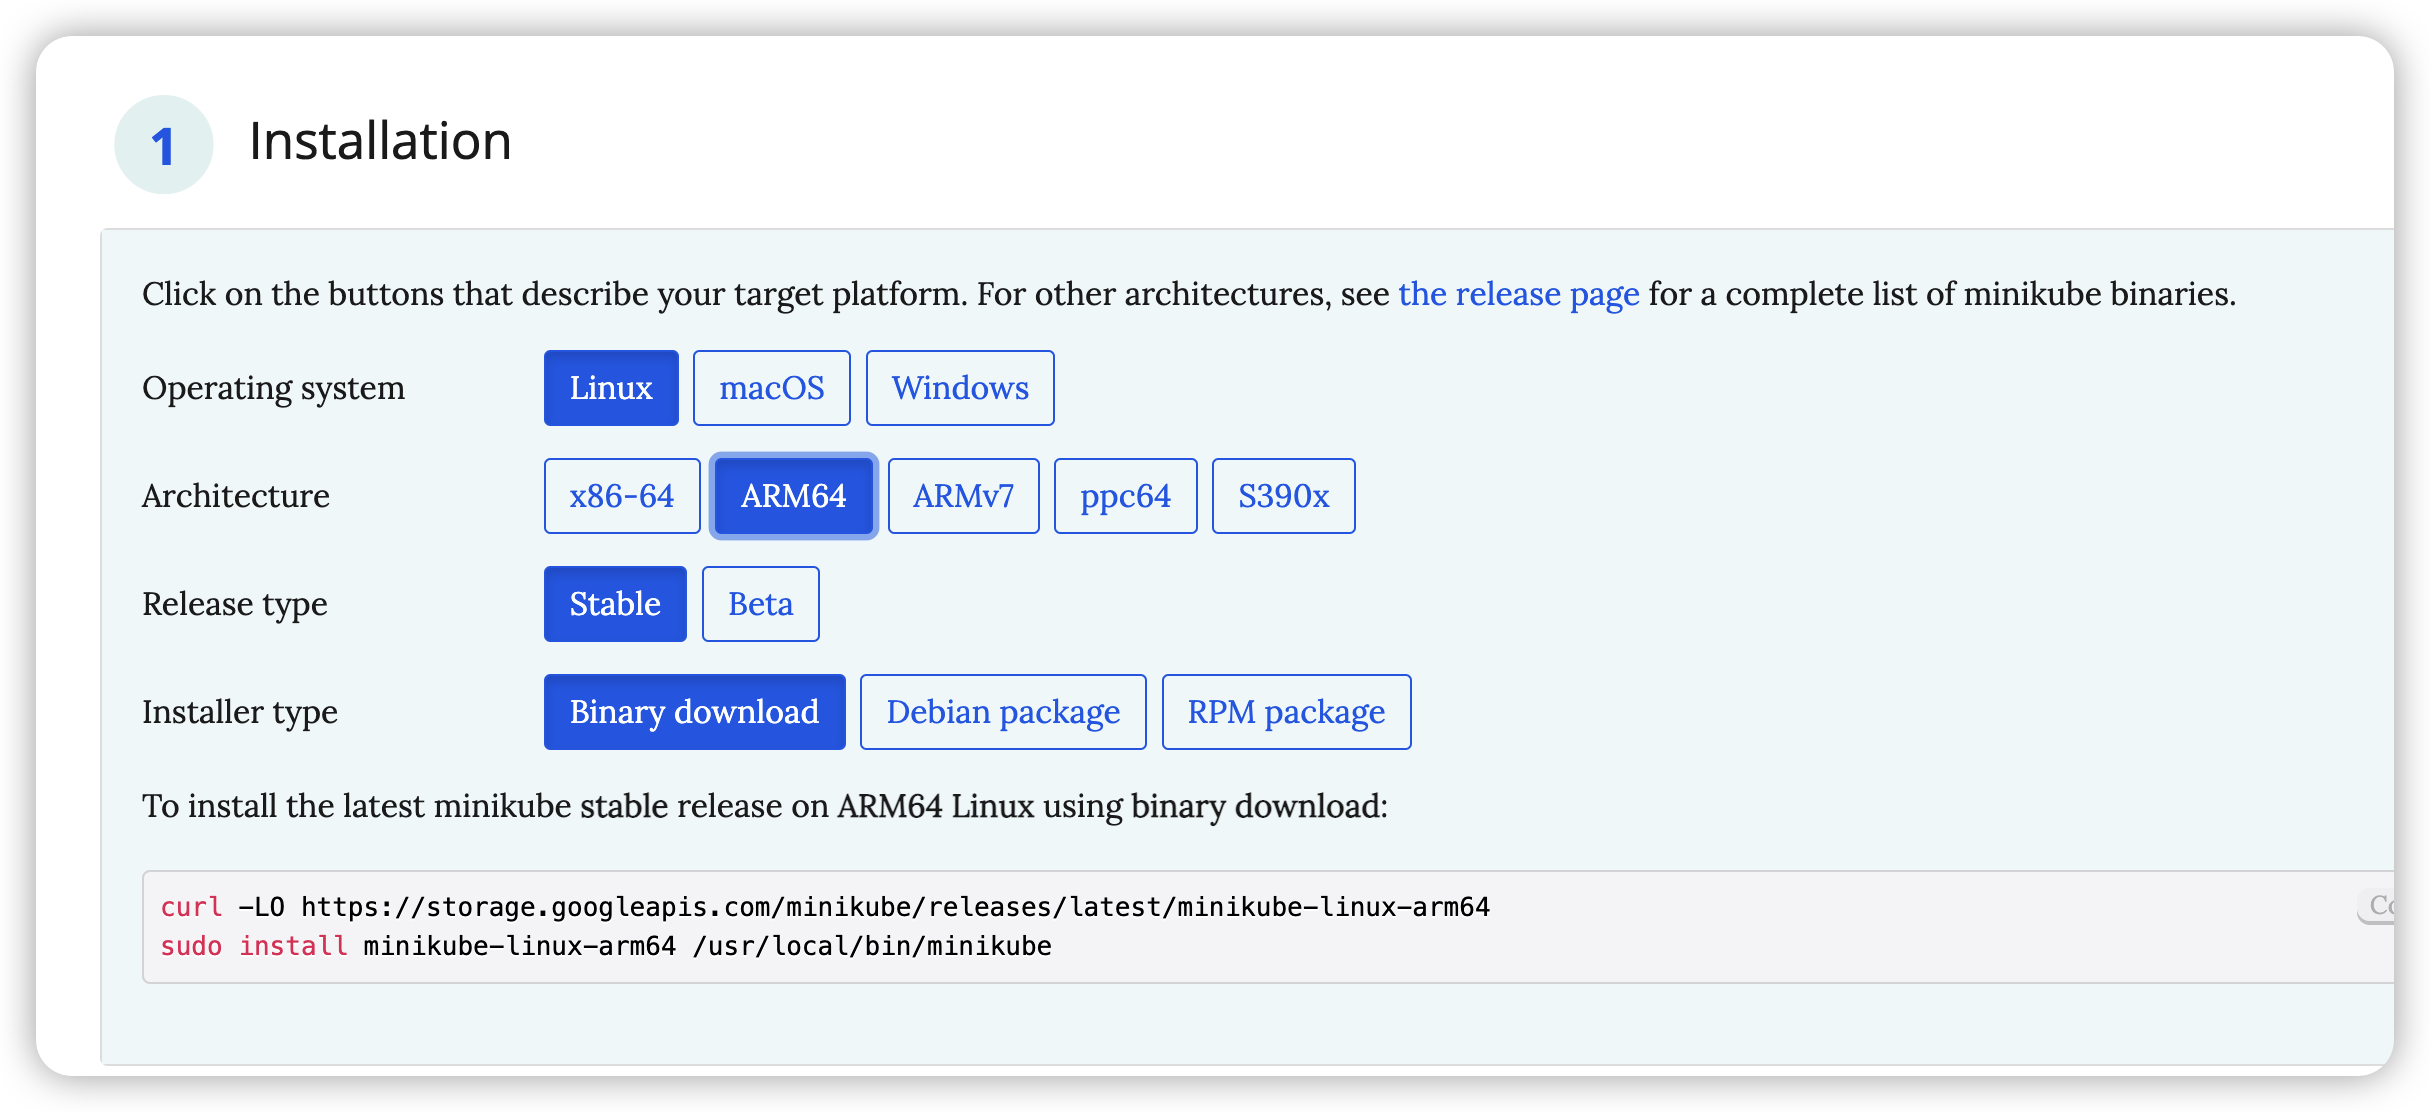
curl -LO https://storage.googleapis.com/minikube/releases/latest/minikube-linux-arm64
sudo install minikube-linux-arm64 /usr/local/bin/minikubewxvirus@ARM-Virtual-Machine:~$ minikube version
minikube version: v1.27.1
commit: fe869b5d4da11ba318eb84a3ac00f336411de7ba要操作K8S还需要专门的客户端工具kubectl,也是一个命令行工具,将k8s后台服务通信,把我们的命令转发给k8s,实现容器和集群的管理功能。它是和k8s和minikube彼此独立的项目,需要额外完整,但是minikube提供了安装它的简化方式:
wxvirus@ARM-Virtual-Machine:~$ minikube kubectl
    > kubectl.sha256:  64 B / 64 B [-------------------------] 100.00% ? p/s 0s
    > kubectl:  41.56 MiB / 41.56 MiB [------------] 100.00% 21.88 MiB p/s 2.1s
kubectl controls the Kubernetes cluster manager.

 Find more information at: https://kubernetes.io/docs/reference/kubectl/

Basic Commands (Beginner):
  create          Create a resource from a file or from stdin
  expose          Take a replication controller, service, deployment or pod and expose it as a new Kubernetes service
  run             在集群上运行特定镜像
  set             为对象设置指定特性

Basic Commands (Intermediate):
  explain         Get documentation for a resource
  get             显示一个或多个资源
  edit            编辑服务器上的资源
  delete          Delete resources by file names, stdin, resources and names, or by resources and label selector

Deploy Commands:
  rollout         Manage the rollout of a resource
  scale           Set a new size for a deployment, replica set, or replication controller
  autoscale       Auto-scale a deployment, replica set, stateful set, or replication controller

Cluster Management Commands:
  certificate     修改证书资源。
  cluster-info    Display cluster information
  top             Display resource (CPU/memory) usage
  cordon          标记节点为不可调度
  uncordon        标记节点为可调度
  drain           清空节点以准备维护
  taint           更新一个或者多个节点上的污点

Troubleshooting and Debugging Commands:
  describe        显示特定资源或资源组的详细信息
  logs            打印 Pod 中容器的日志
  attach          挂接到一个运行中的容器
  exec            在某个容器中执行一个命令
  port-forward    将一个或多个本地端口转发到某个 Pod
  proxy           运行一个指向 Kubernetes API 服务器的代理
  cp              Copy files and directories to and from containers
  auth            Inspect authorization
  debug           Create debugging sessions for troubleshooting workloads and nodes

Advanced Commands:
  diff            Diff the live version against a would-be applied version
  apply           Apply a configuration to a resource by file name or stdin
  patch           Update fields of a resource
  replace         Replace a resource by file name or stdin
  wait            Experimental: Wait for a specific condition on one or many resources
  kustomize       Build a kustomization target from a directory or URL.

Settings Commands:
  label           更新某资源上的标签
  annotate        更新一个资源的注解
  completion      Output shell completion code for the specified shell (bash, zsh, fish, or powershell)

Other Commands:
  alpha           Commands for features in alpha
  api-resources   Print the supported API resources on the server
  api-versions    Print the supported API versions on the server, in the form of "group/version"
  config          修改 kubeconfig 文件
  plugin          Provides utilities for interacting with plugins
  version         输出客户端和服务端的版本信息

Usage:
  kubectl [flags] [options]

Use "kubectl <command> --help" for more information about a given command.
Use "kubectl options" for a list of global command-line options (applies to all commands).验证 minikube 环境
运行minikube,创建k8s实验环境,指定k8s版本为1.23.3
minikube start --kubernetes-version=v1.23.3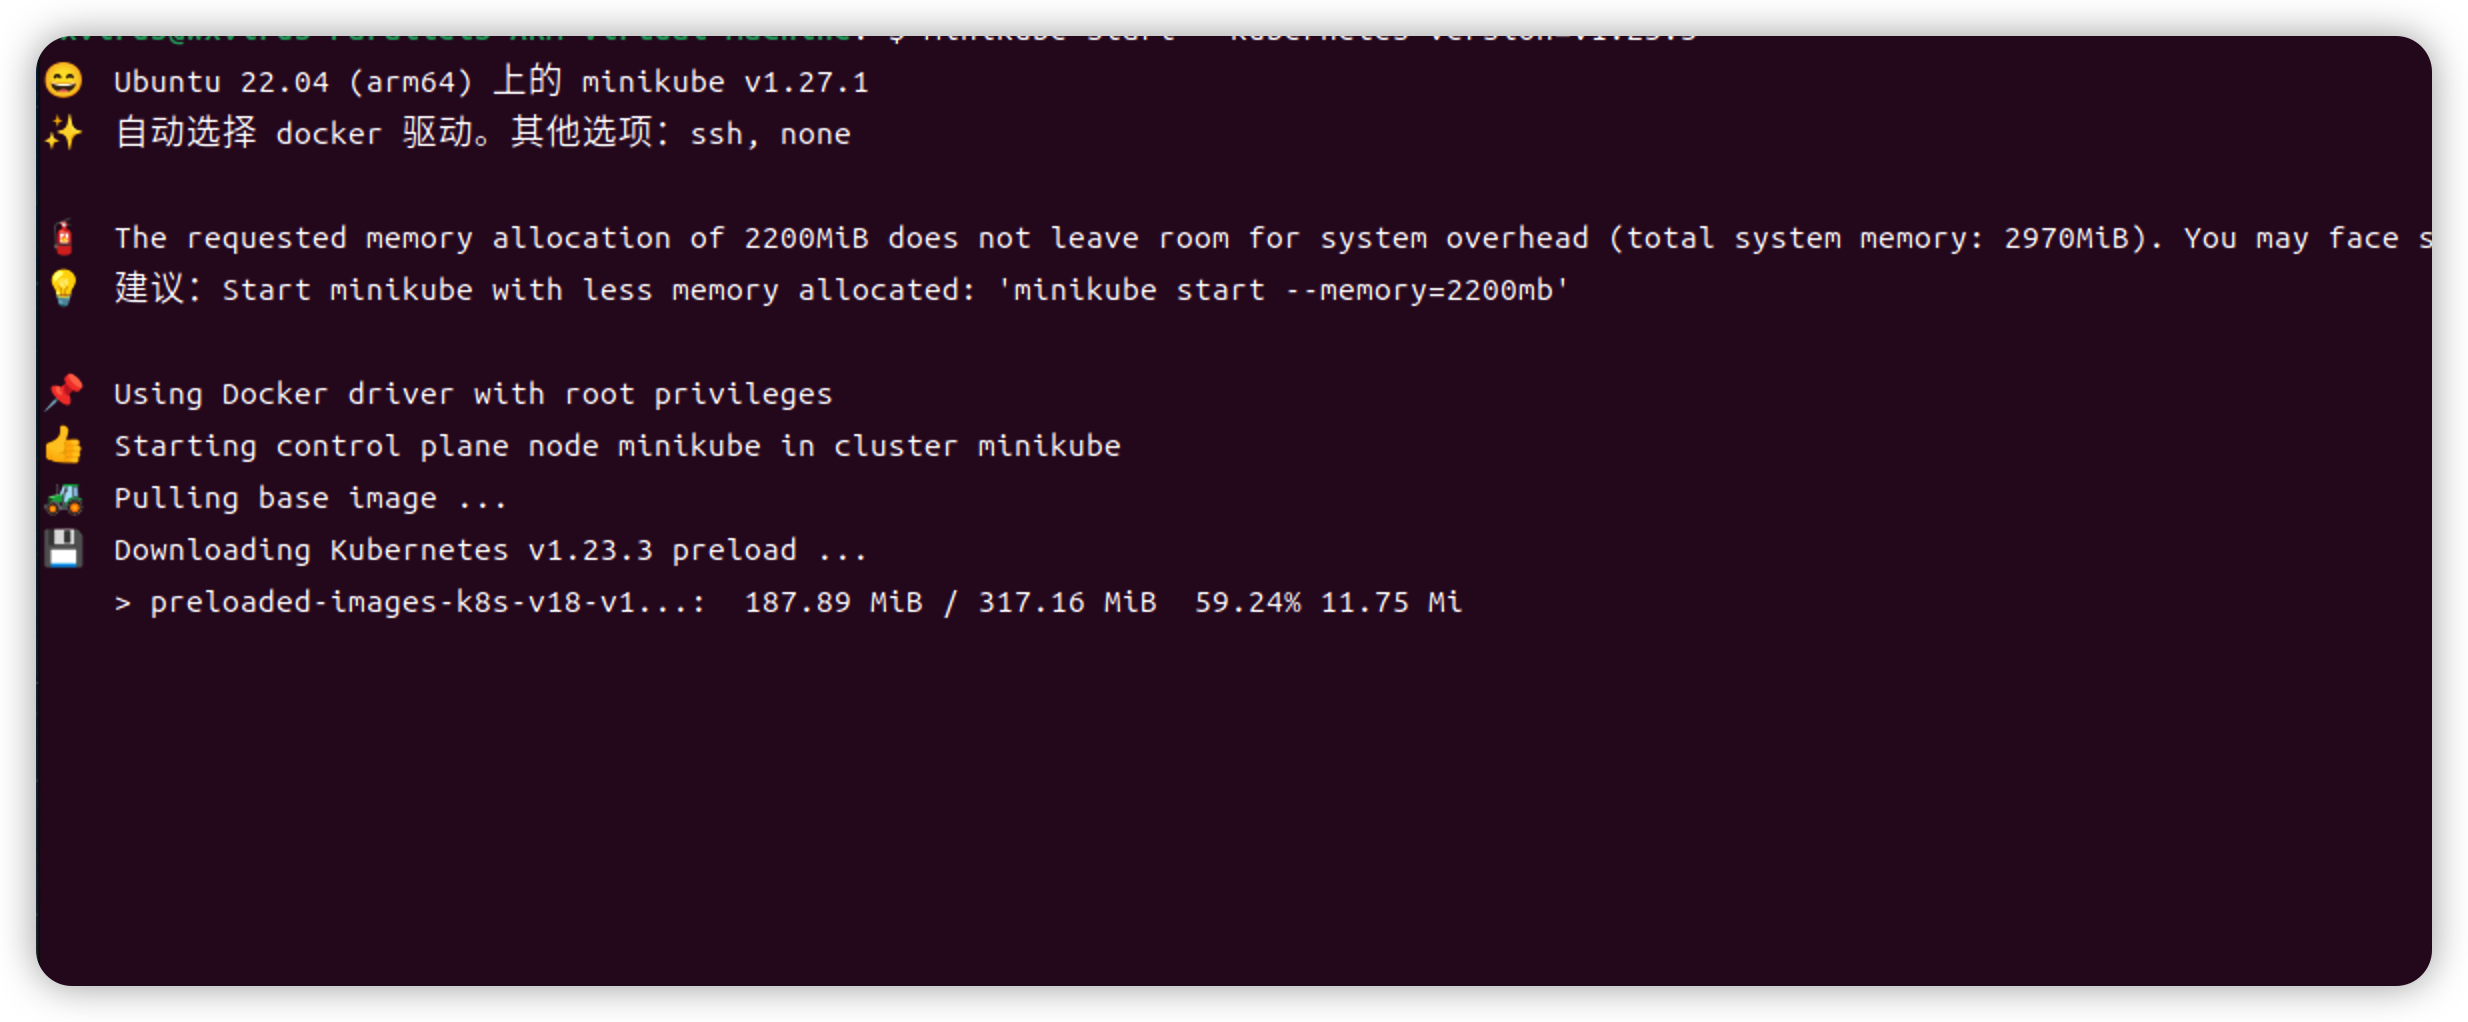
使用下面命令等他完全启动之后查看集群的状态:
minikube status
minikube node list这安装的时间有点长。。。我暂时不等这个了
rancher 安装 K8S 集群
准备工作
非必须
停止所有容器
bashdocker stop $(docker ps -a -q)删除所有容器
bashdocker rm $(docker ps -a -q)
必须
关闭防火墙,如果有
iptables也全部干掉bashsystemctl stop firewalld && systemctl disable firewalld关闭
selinuxsetenforce 0set -i's/SELINUX=enforcing/SELINUX=disabled/g' /etc/selinux/config
关闭
swapbashswapoff -a
重启
dockerbashsudo systemctl daemon-reload sudo systemctl restart docker
docker 安装
由于一些原因,使用官方镜像源安装慢,可以使用如下命令进行安装,不过
-v /home/wxvirus/rancher:/var/lib/rancher前面部分换成自己的路径,这里使用的是国内的,比较快。
注意
一定要在你的用户目录下新建一个rancher目录
docker run -itd --privileged  -p 8080:80 -p 8443:443 \
-v /home/wxvirus/rancher:/var/lib/rancher \
--restart=unless-stopped  -e CATTLE_AGENT_IMAGE="registry.cn-hangzhou.aliyuncs.com/rancher/rancher-agent:v2.4.8"  registry.cn-hangzhou.aliyuncs.com/rancher/rancher:v2.4.8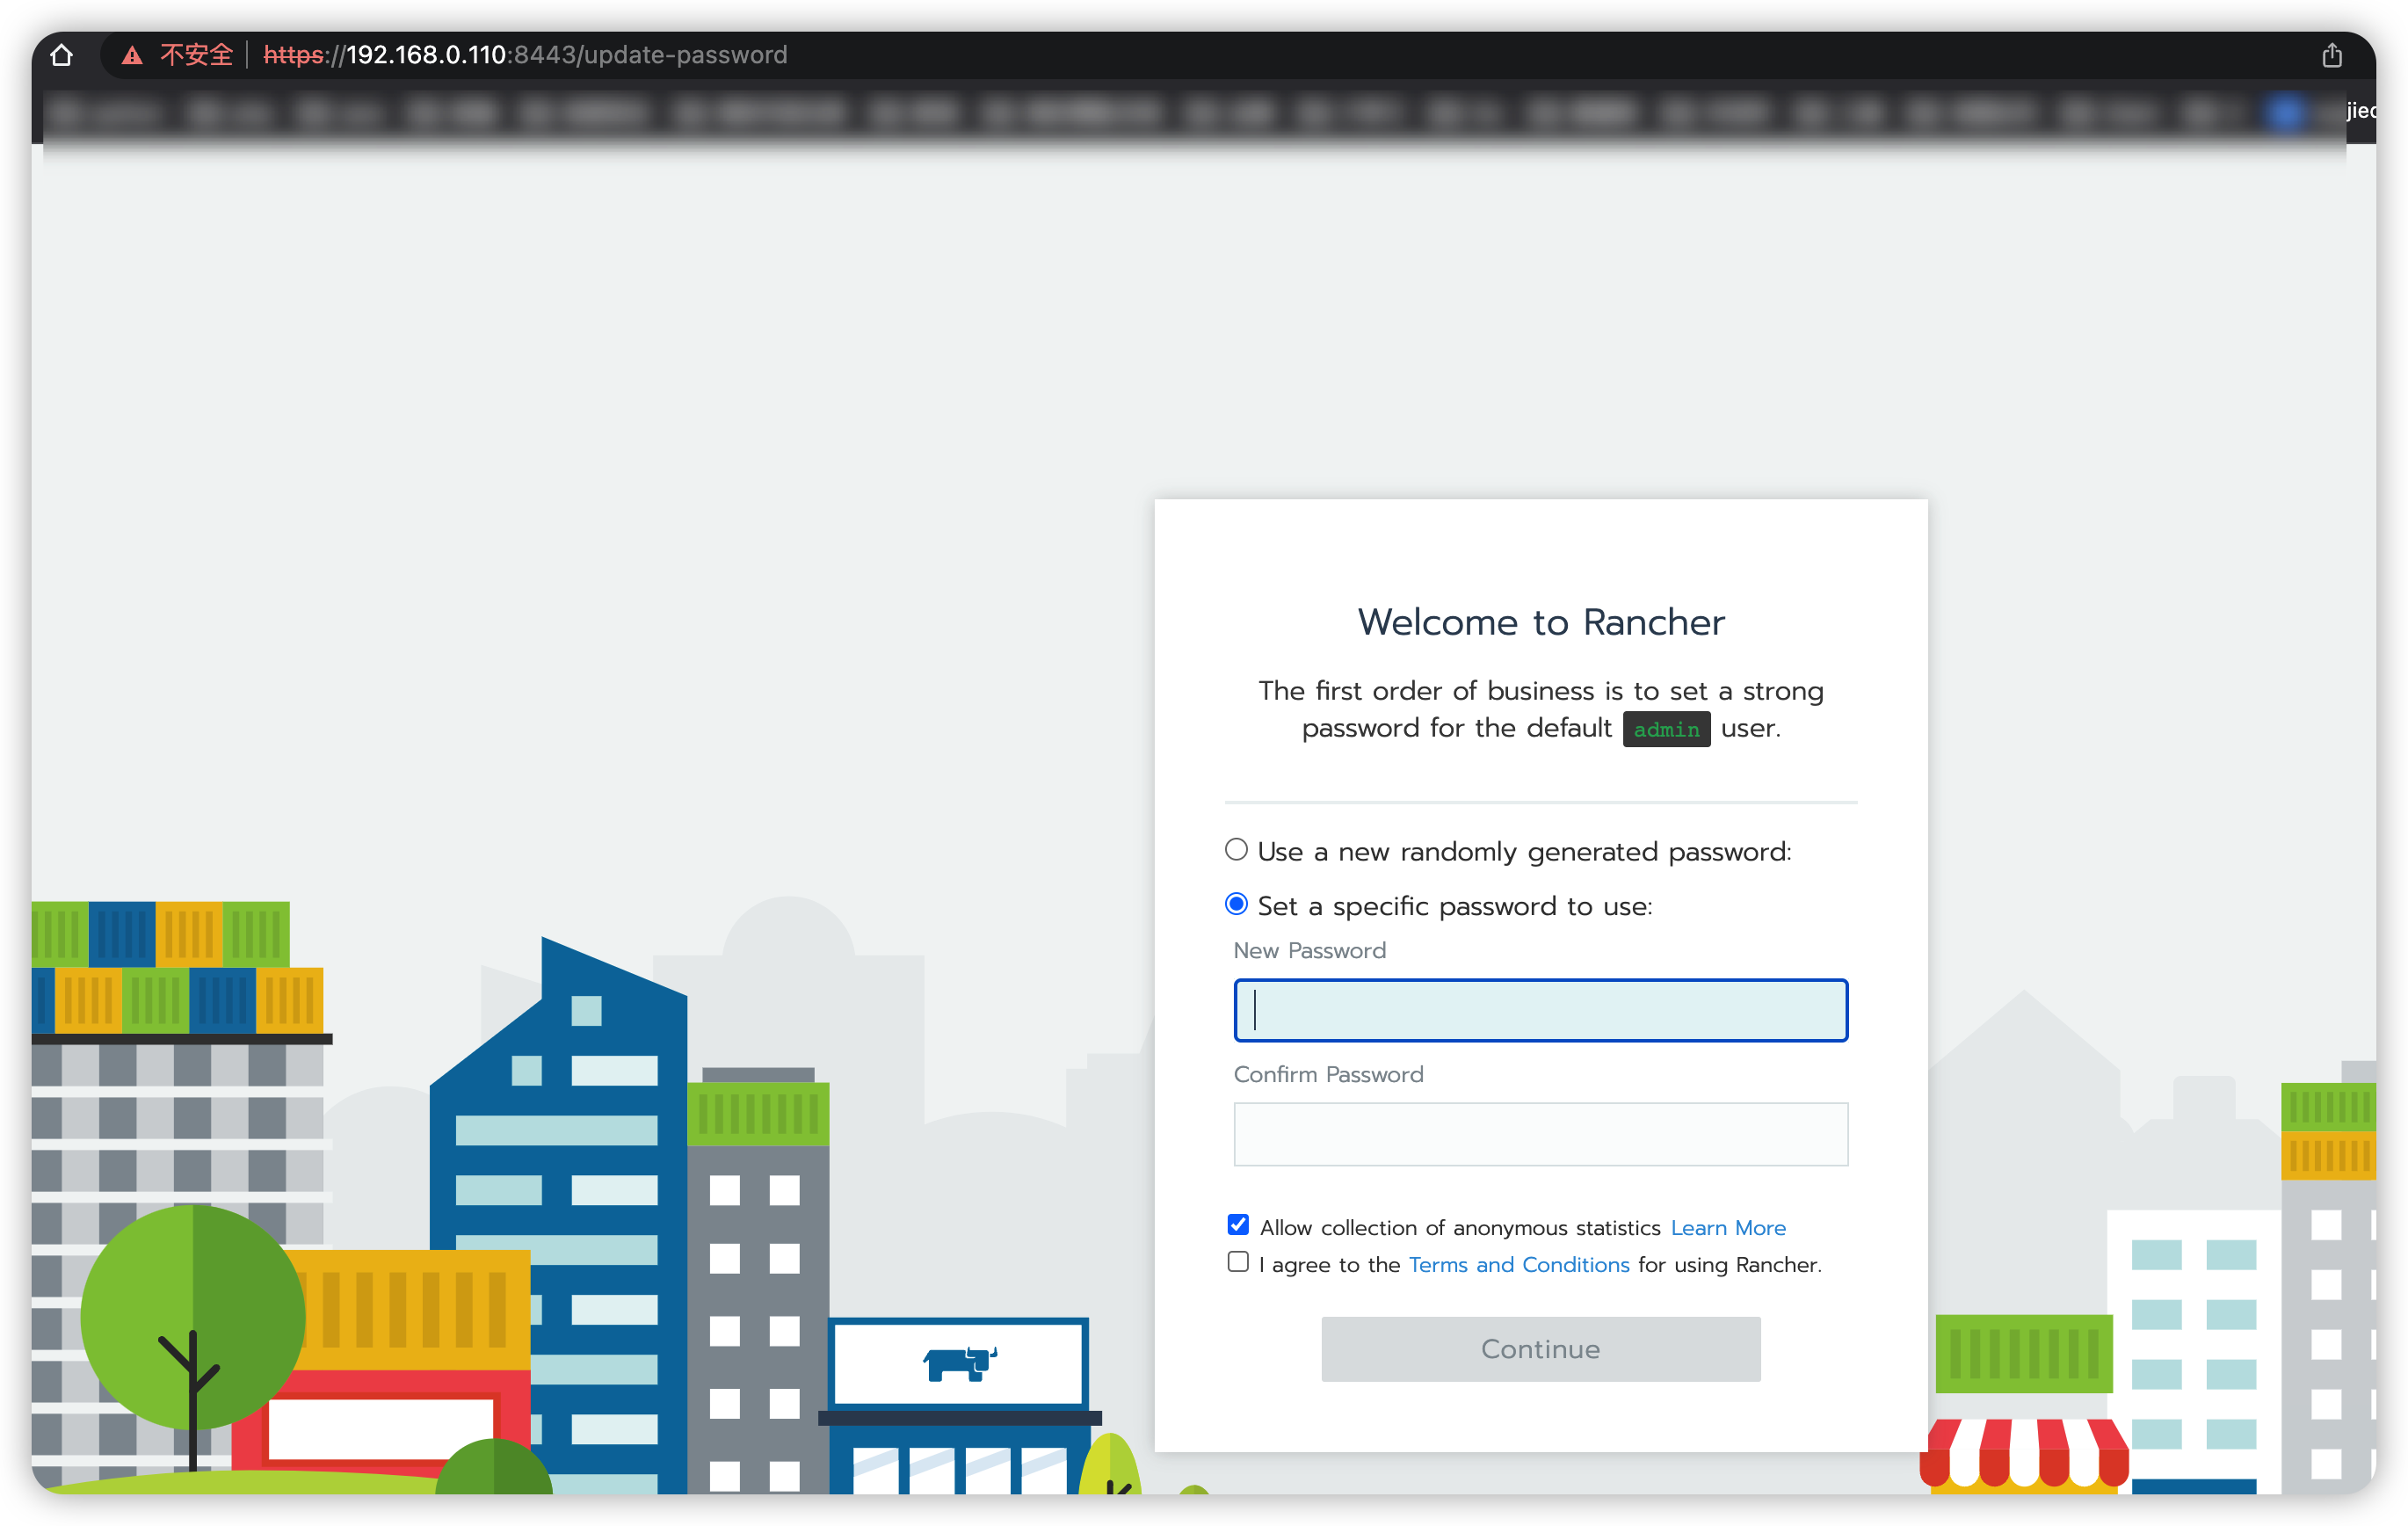
我们在浏览器中输入192.168.0.110:8080,它会自动跳转到8443端口,如果出现什么安全警告,点击继续前往即可。
第一次进入会让你修改密码,输入你自己的密码,然后点击统一继续即可。
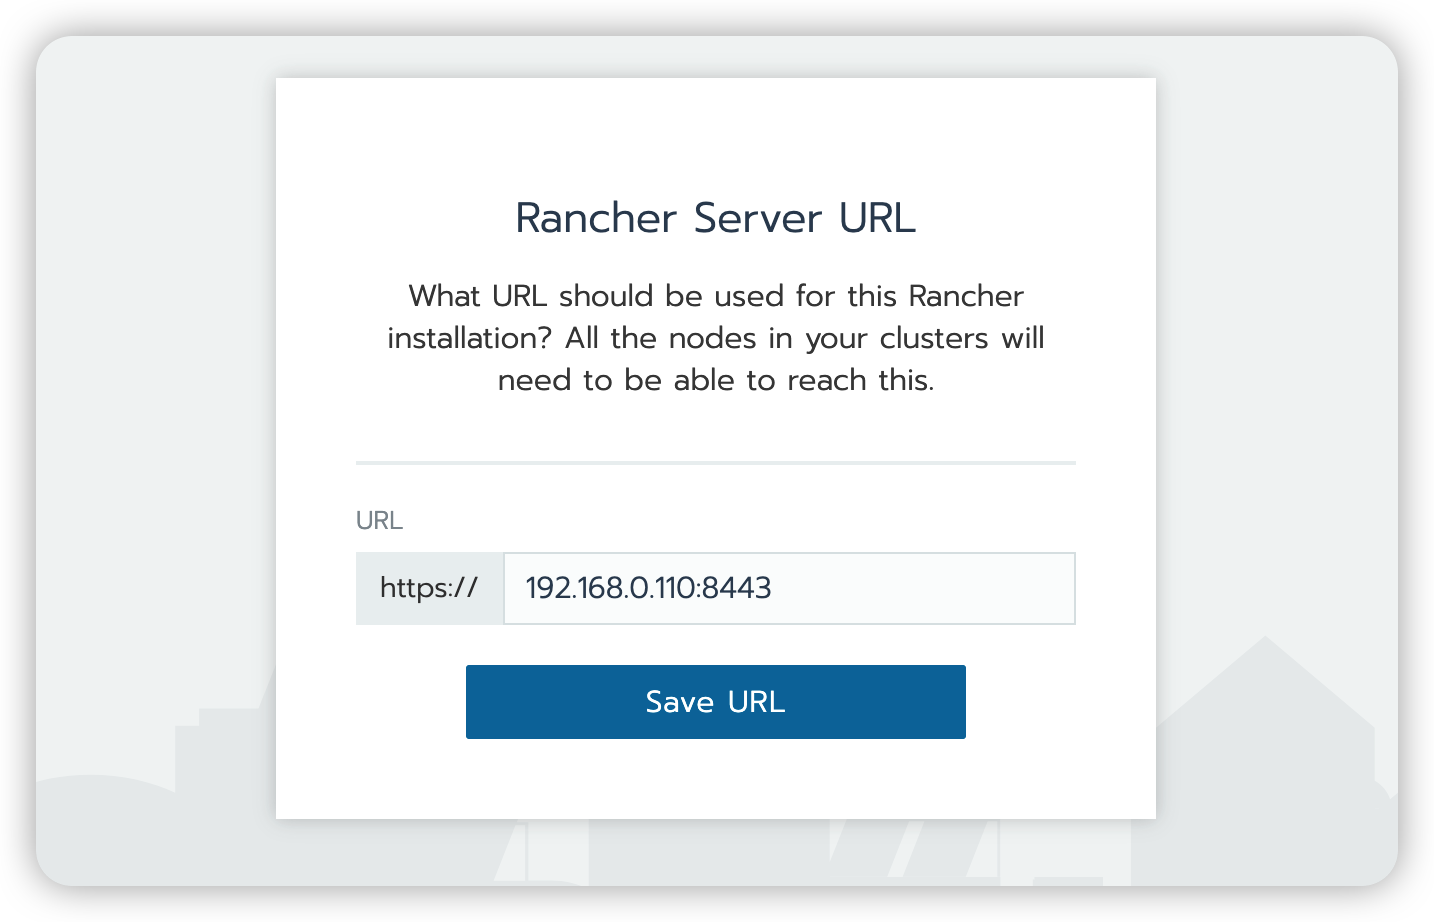
这里一般需要配置你的内网的ip地址,我这是虚拟机,我还是直接填入得了。
可以通过下面的语言进行调整为中文。
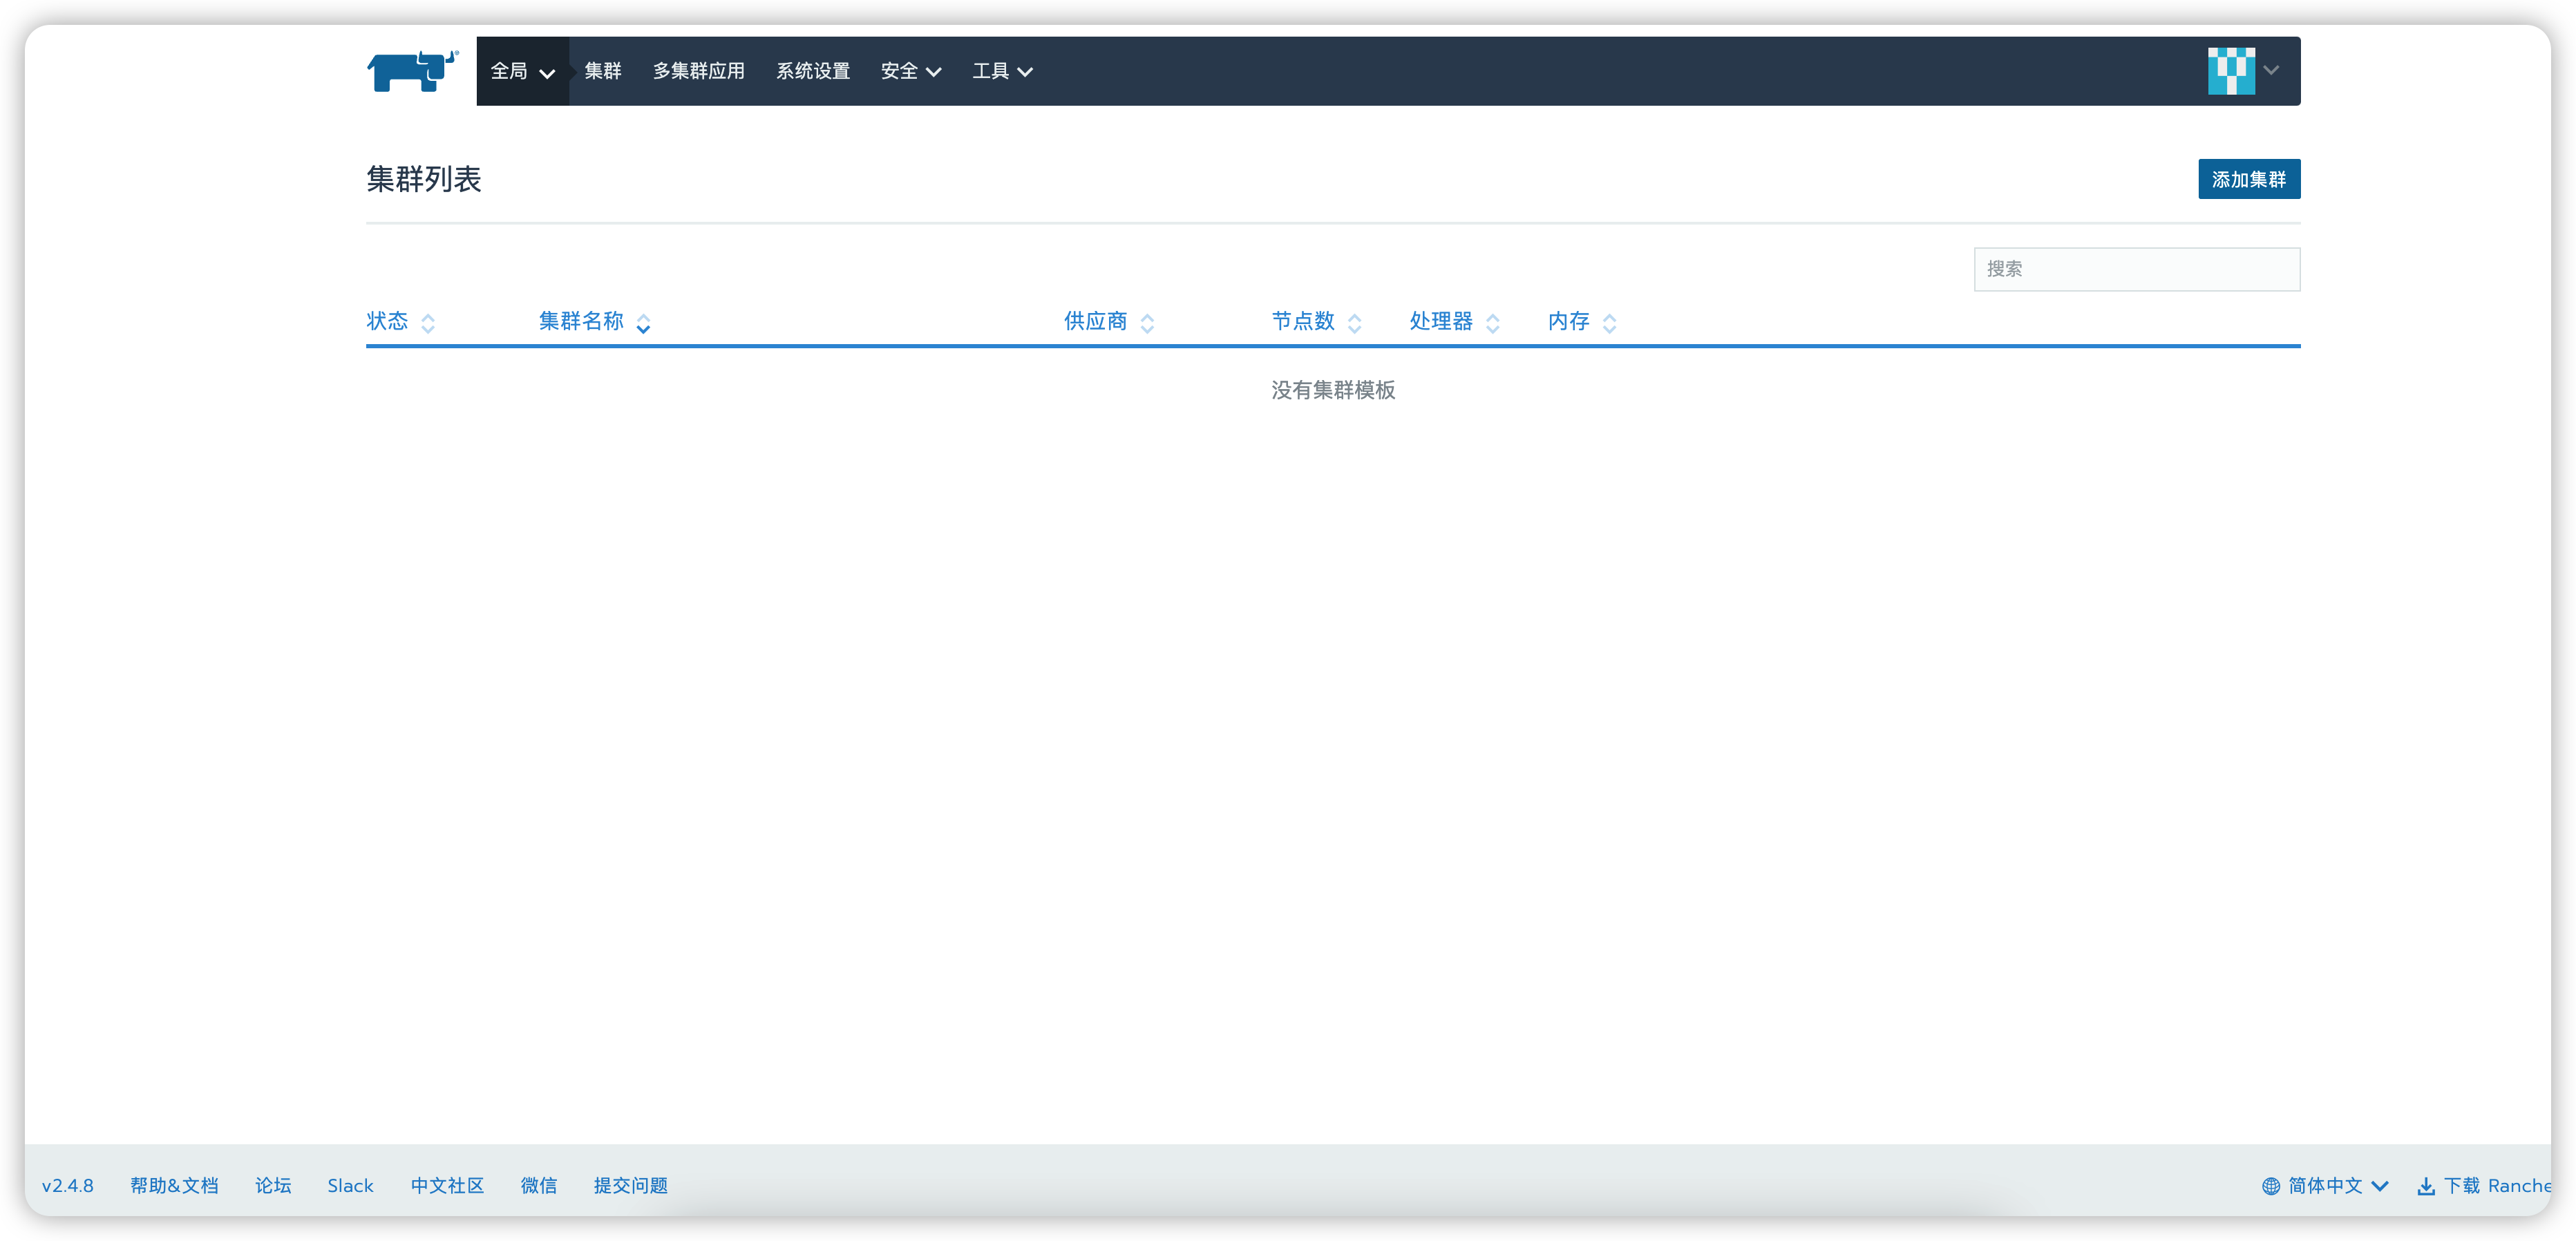
我们点击新建集群
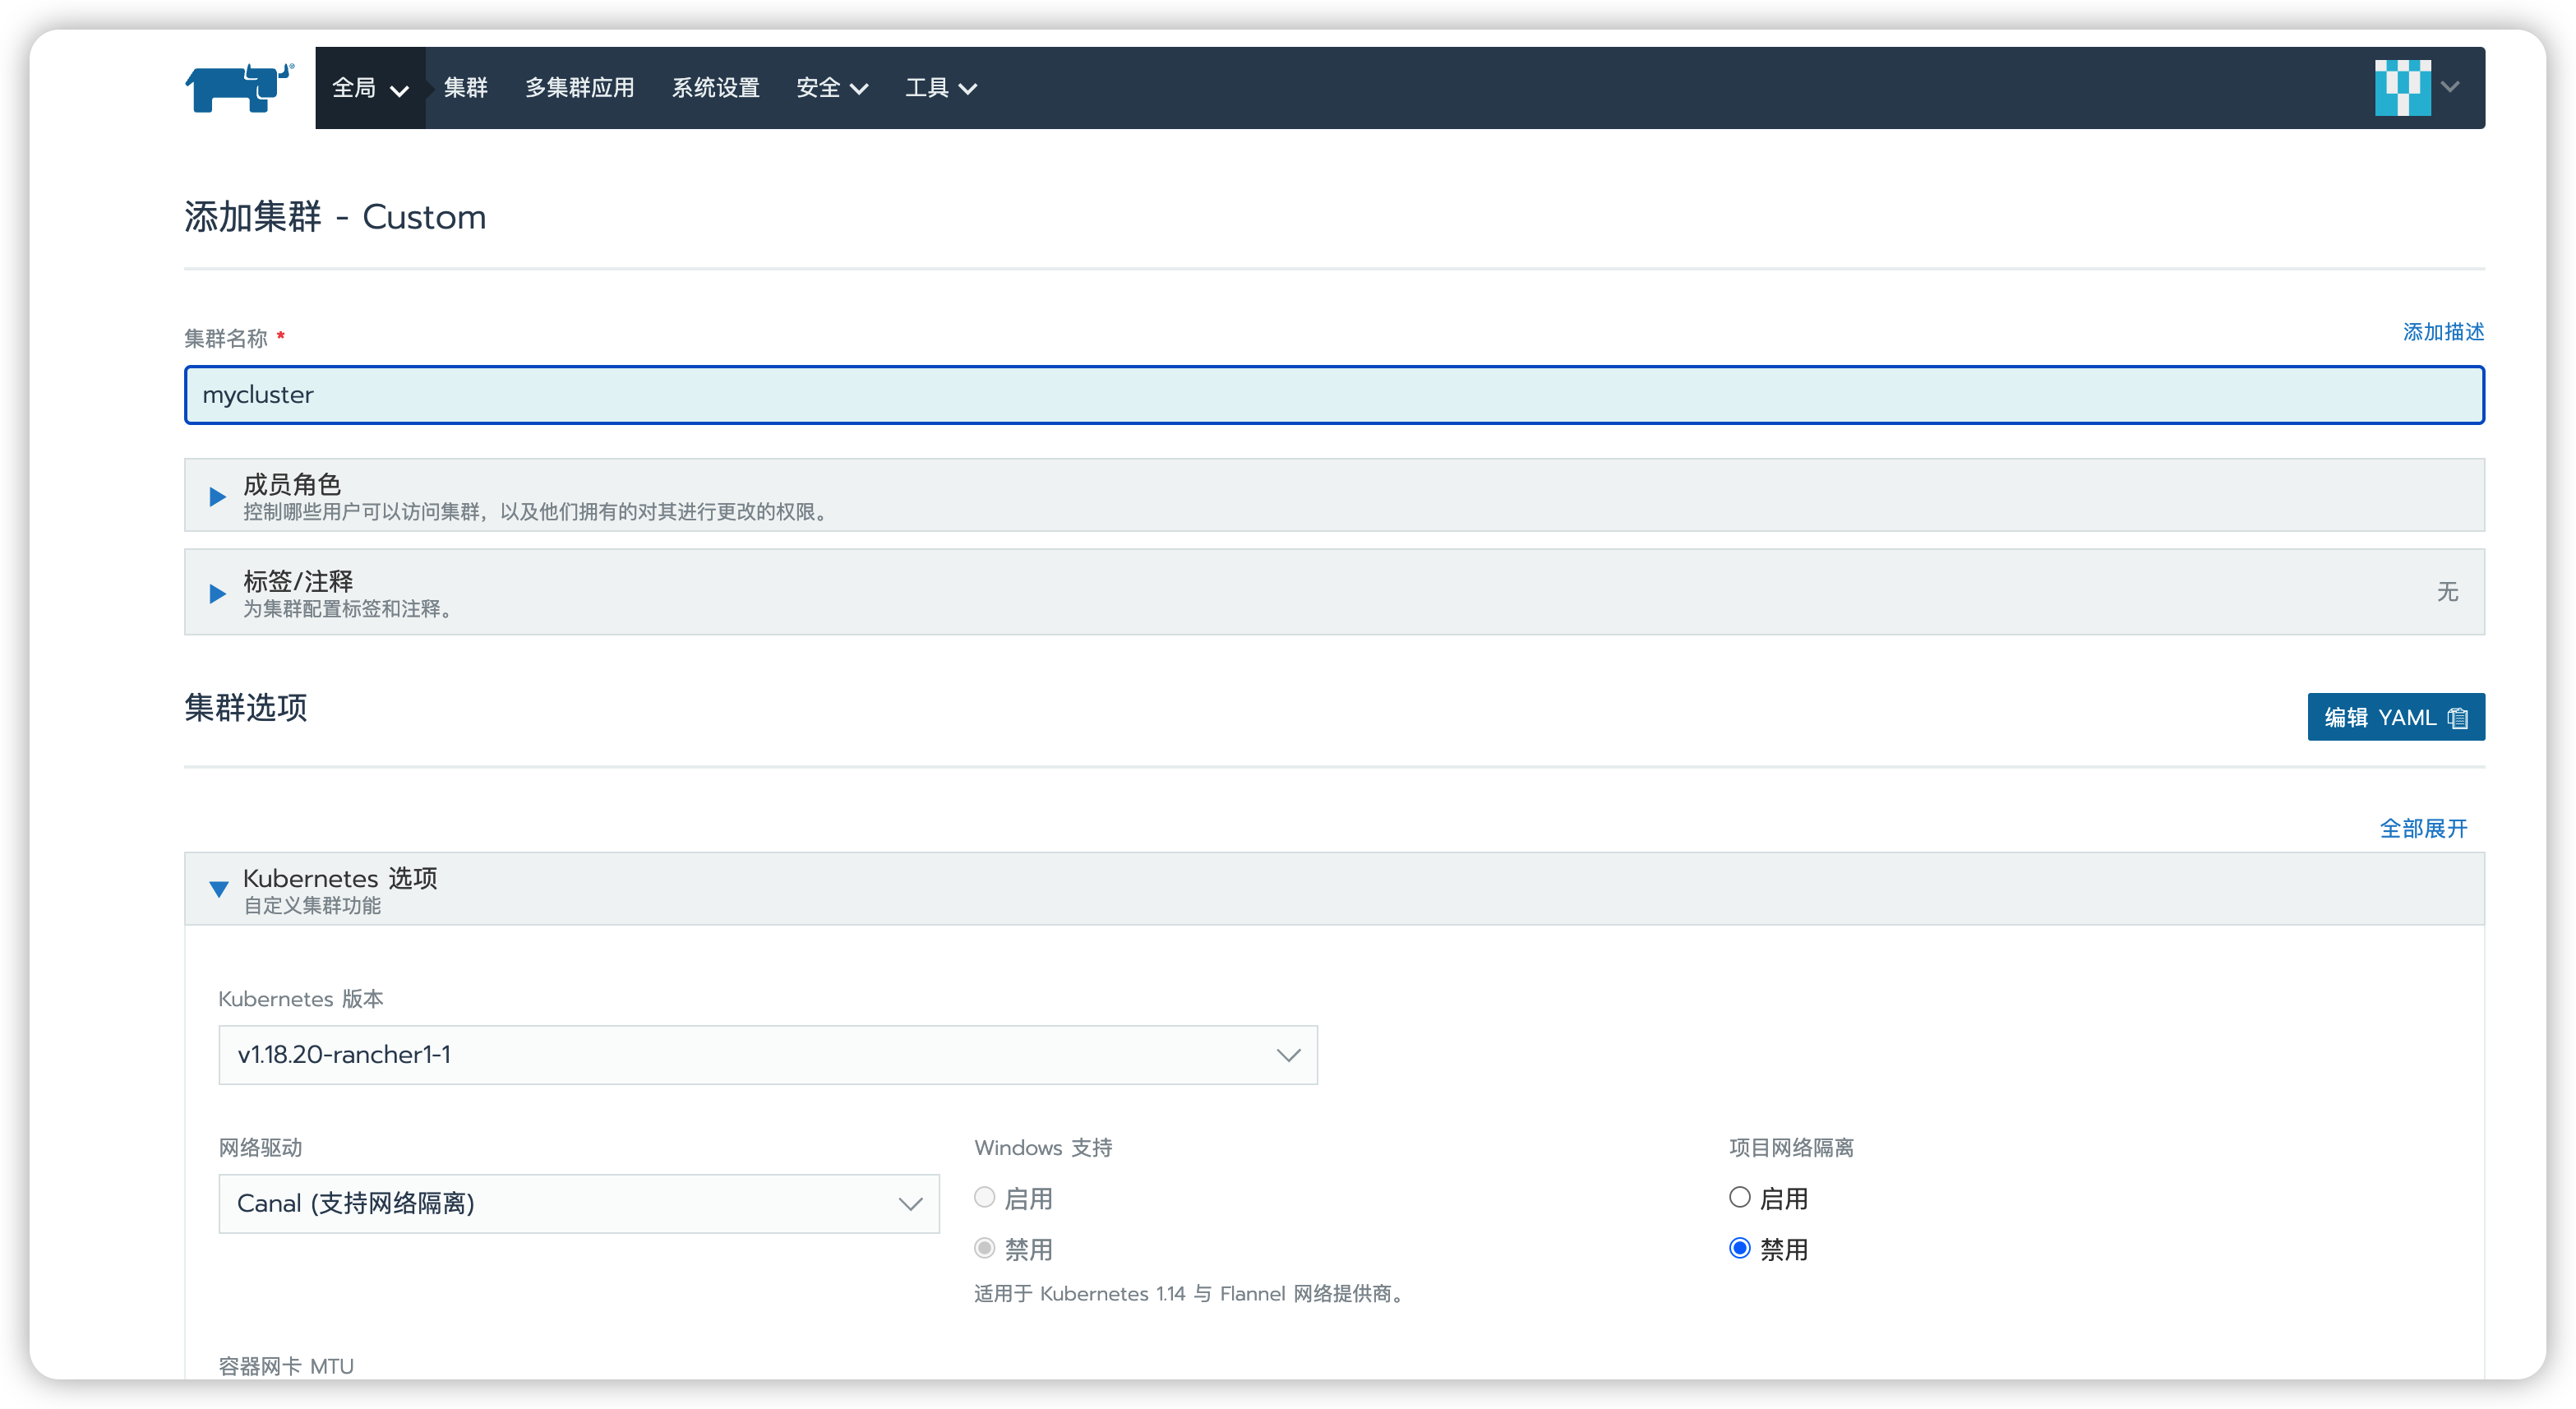
只输入一个集群名称,即可,什么都不用改别的,然后直接下一步;
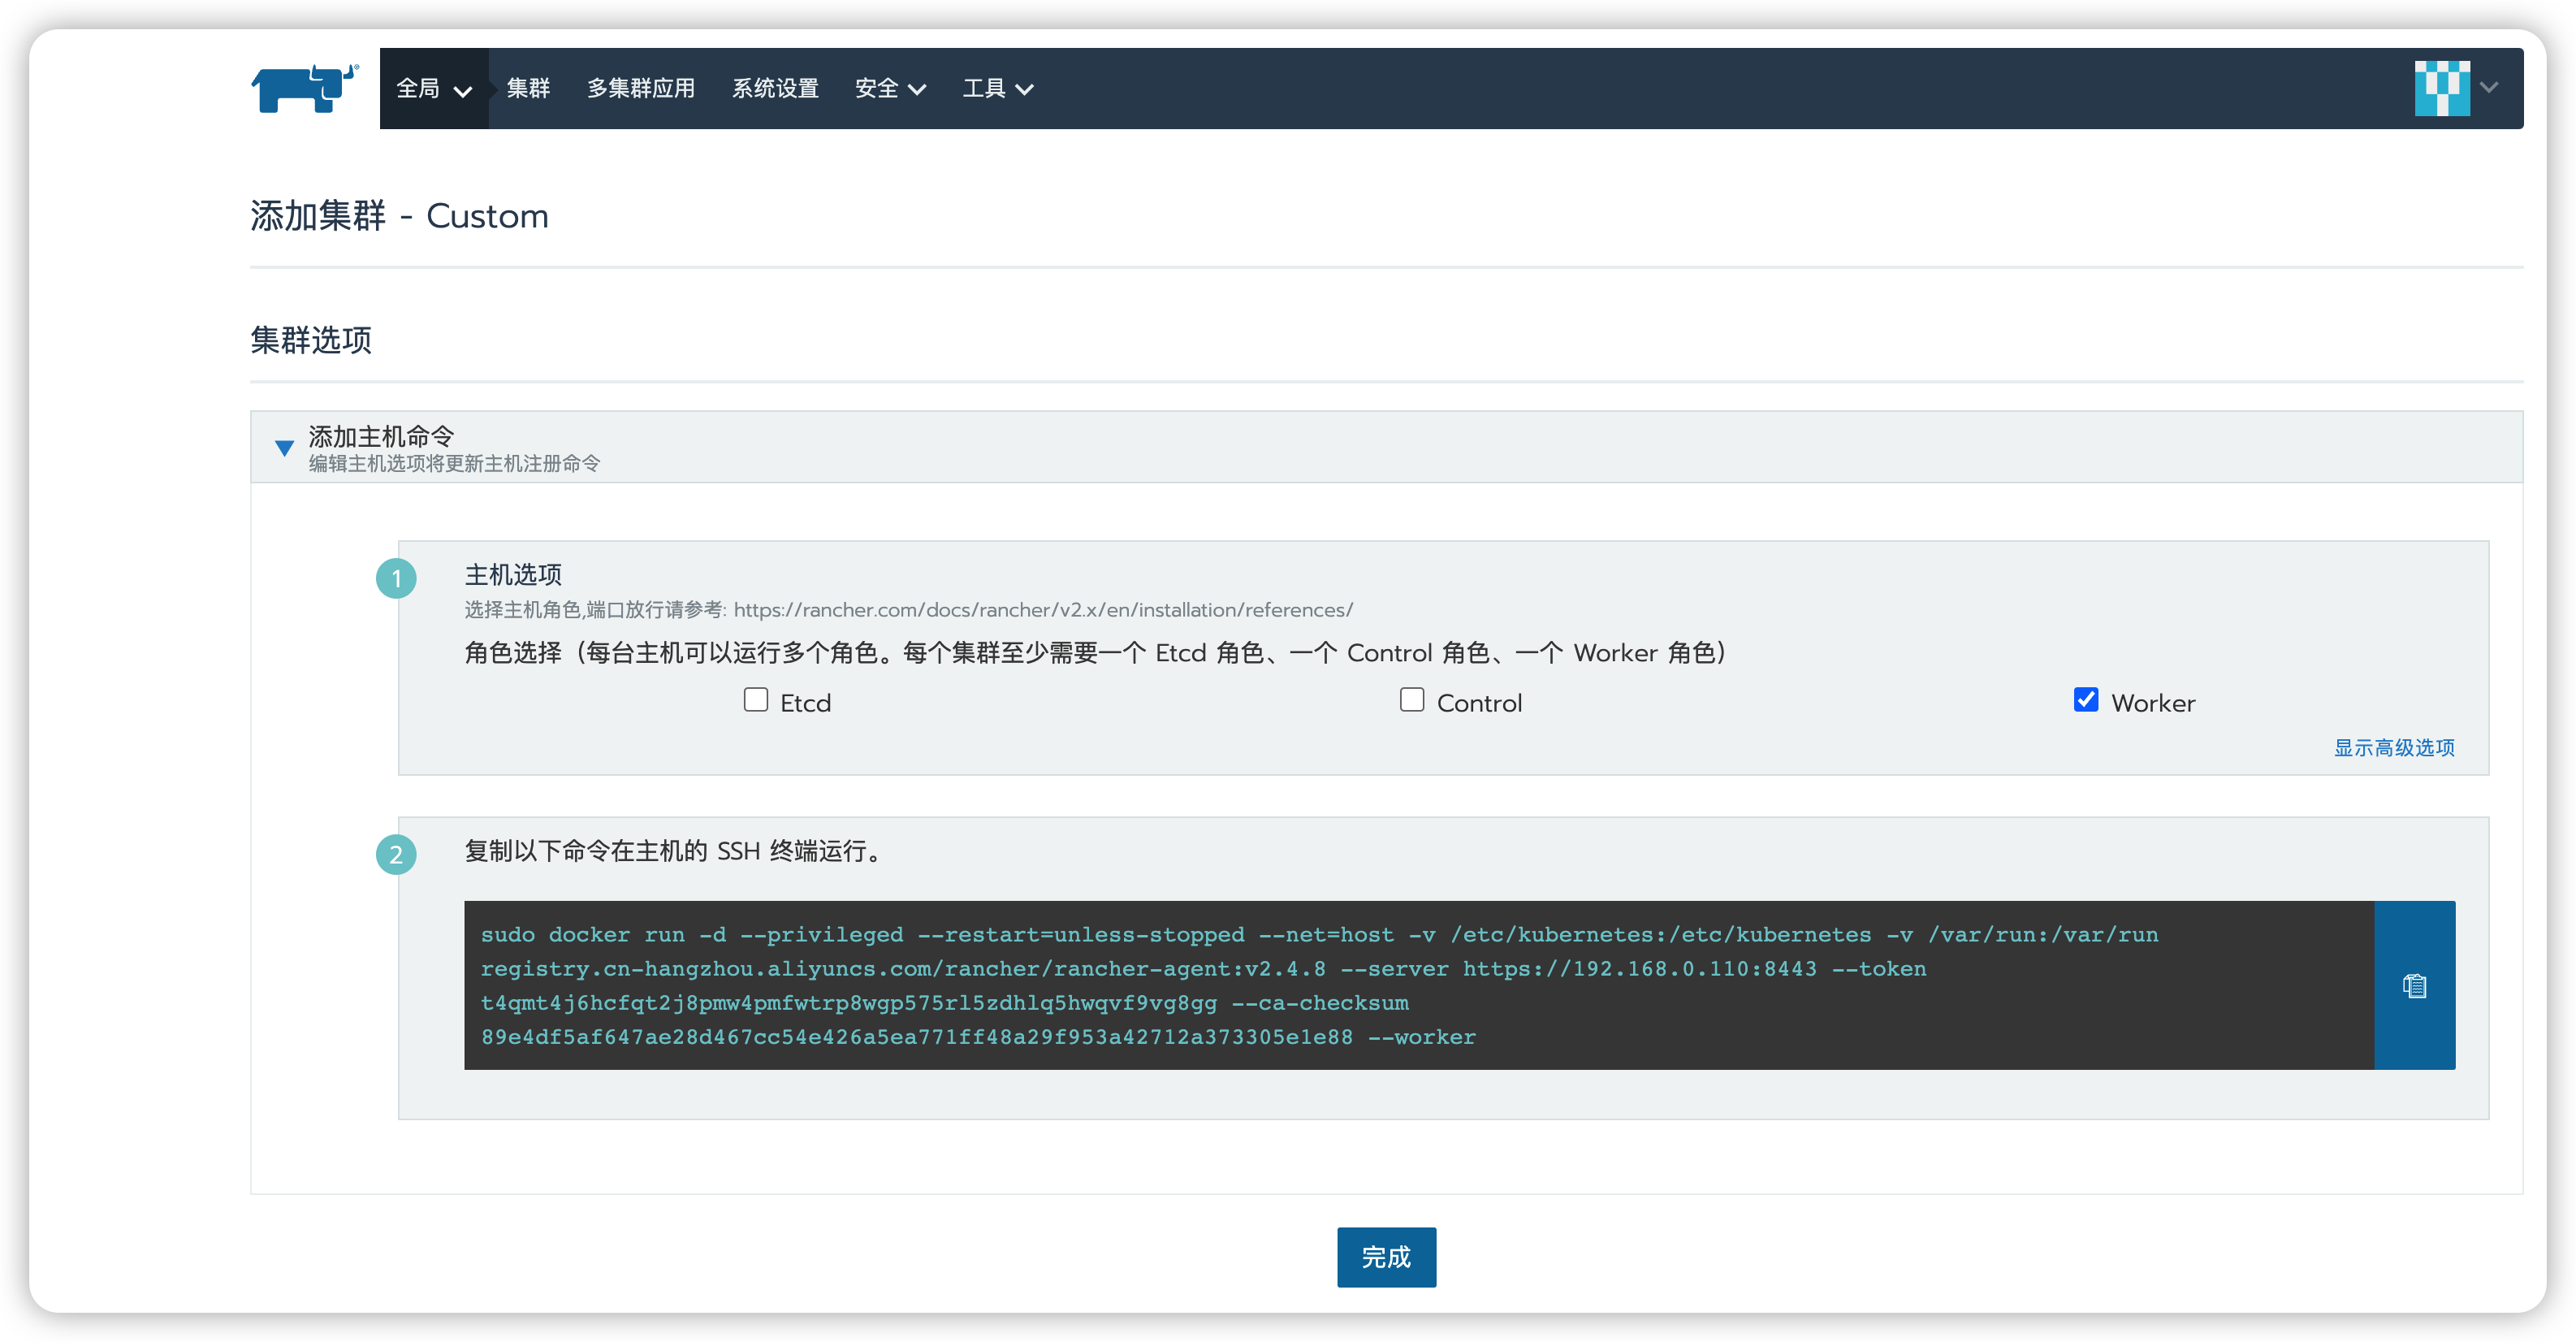
提示
需要将上面三个都勾选上,然后复制下面的命令在主节点进行运行,当前的还是rancher节点,只是安装rancher的
master-node
sudo docker run -d --privileged --restart=unless-stopped --net=host -v /etc/kubernetes:/etc/kubernetes -v /var/run:/var/run registry.cn-hangzhou.aliyuncs.com/rancher/rancher-agent:v2.4.8 --server https://192.168.0.110:8443 --token t4qmt4j6hcfqt2j8pmw4pmfwtrp8wgp575rl5zdhlq5hwqvf9vg8gg --ca-checksum 89e4df5af647ae28d467cc54e426a5ea771ff48a29f953a42712a373305e1e88 --etcd --controlplane --worker下面是worker节点,把上面的,除了Worker以外的都勾选掉,来worker节点进行运行
sudo docker run -d --privileged --restart=unless-stopped --net=host -v /etc/kubernetes:/etc/kubernetes -v /var/run:/var/run registry.cn-hangzhou.aliyuncs.com/rancher/rancher-agent:v2.4.8 --server https://192.168.0.110:8443 --token t4qmt4j6hcfqt2j8pmw4pmfwtrp8wgp575rl5zdhlq5hwqvf9vg8gg --ca-checksum 89e4df5af647ae28d467cc54e426a5ea771ff48a29f953a42712a373305e1e88 --worker然后静静等待安装,会有很多镜像需要下载,等到出现以下内容
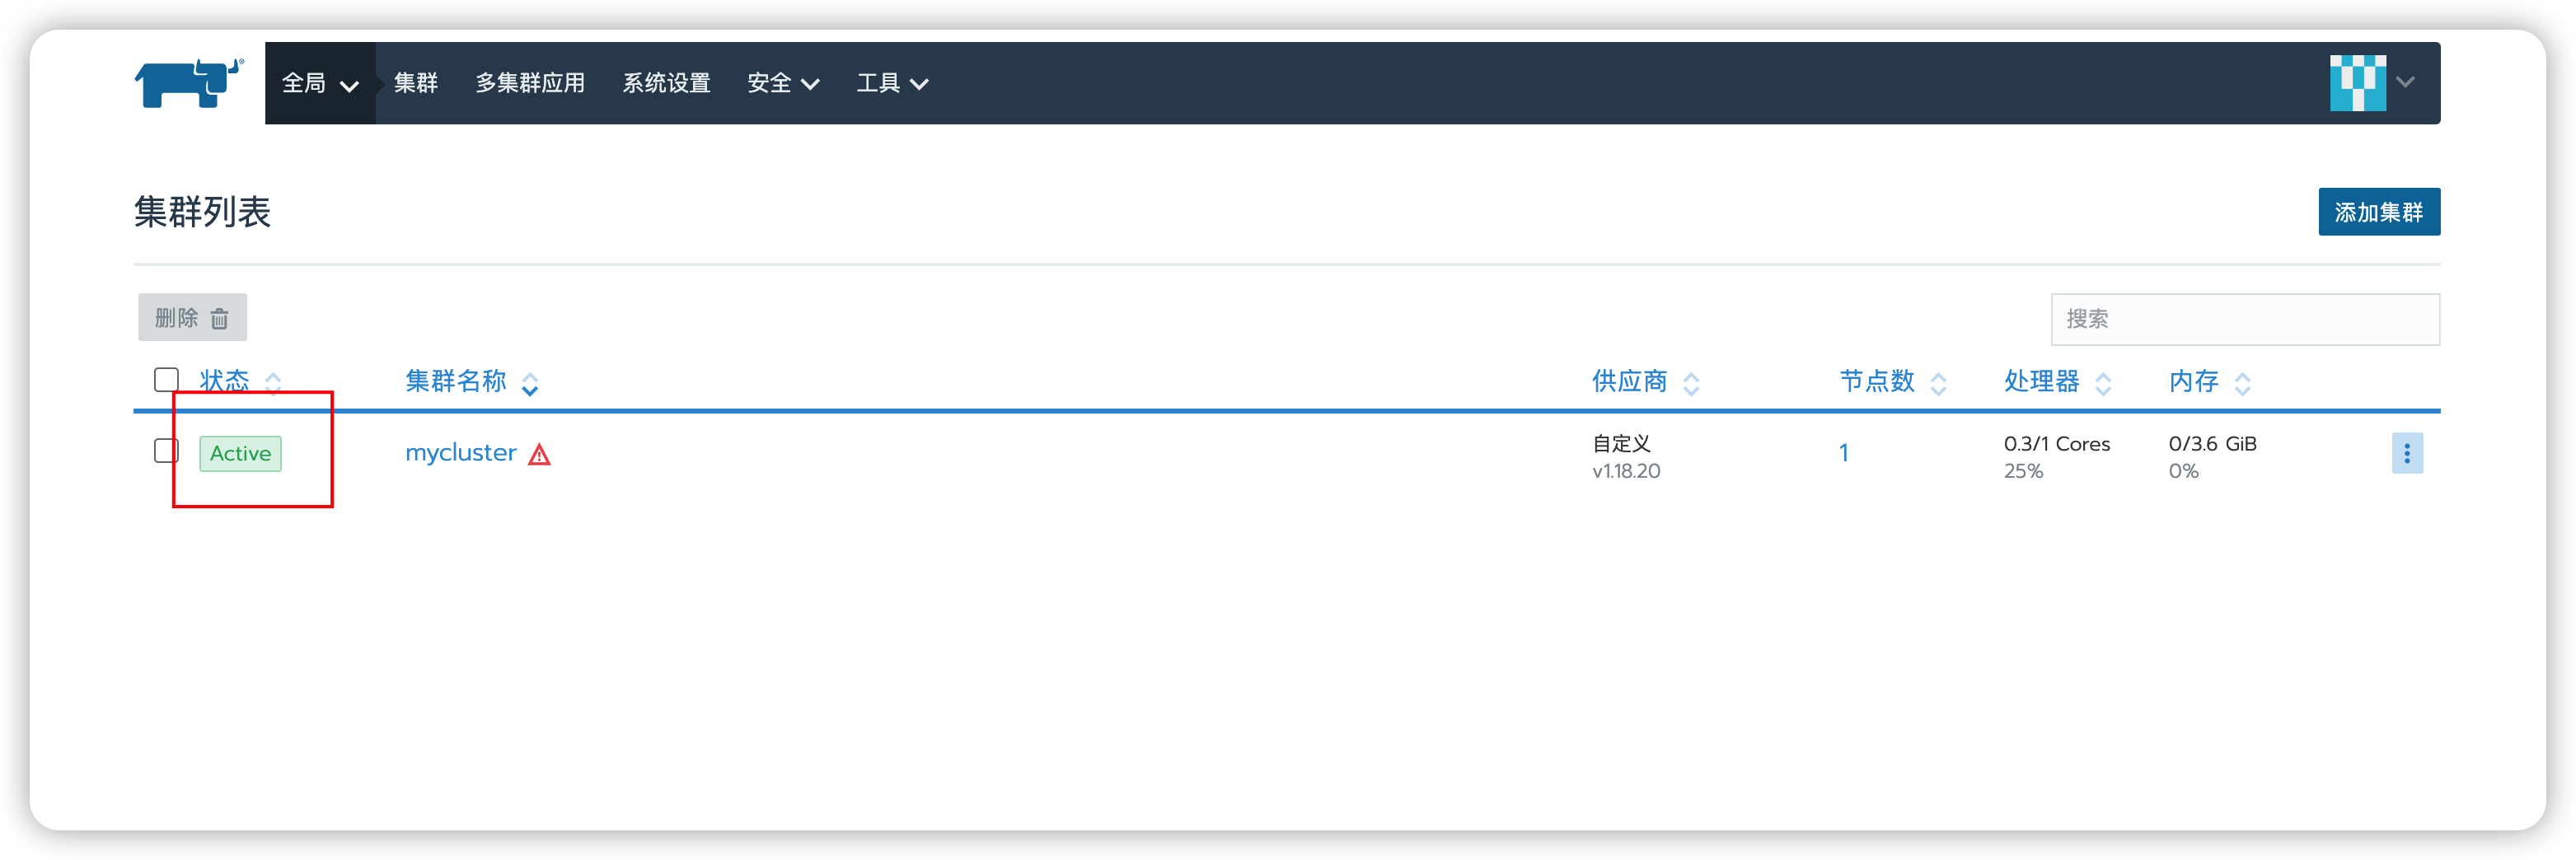
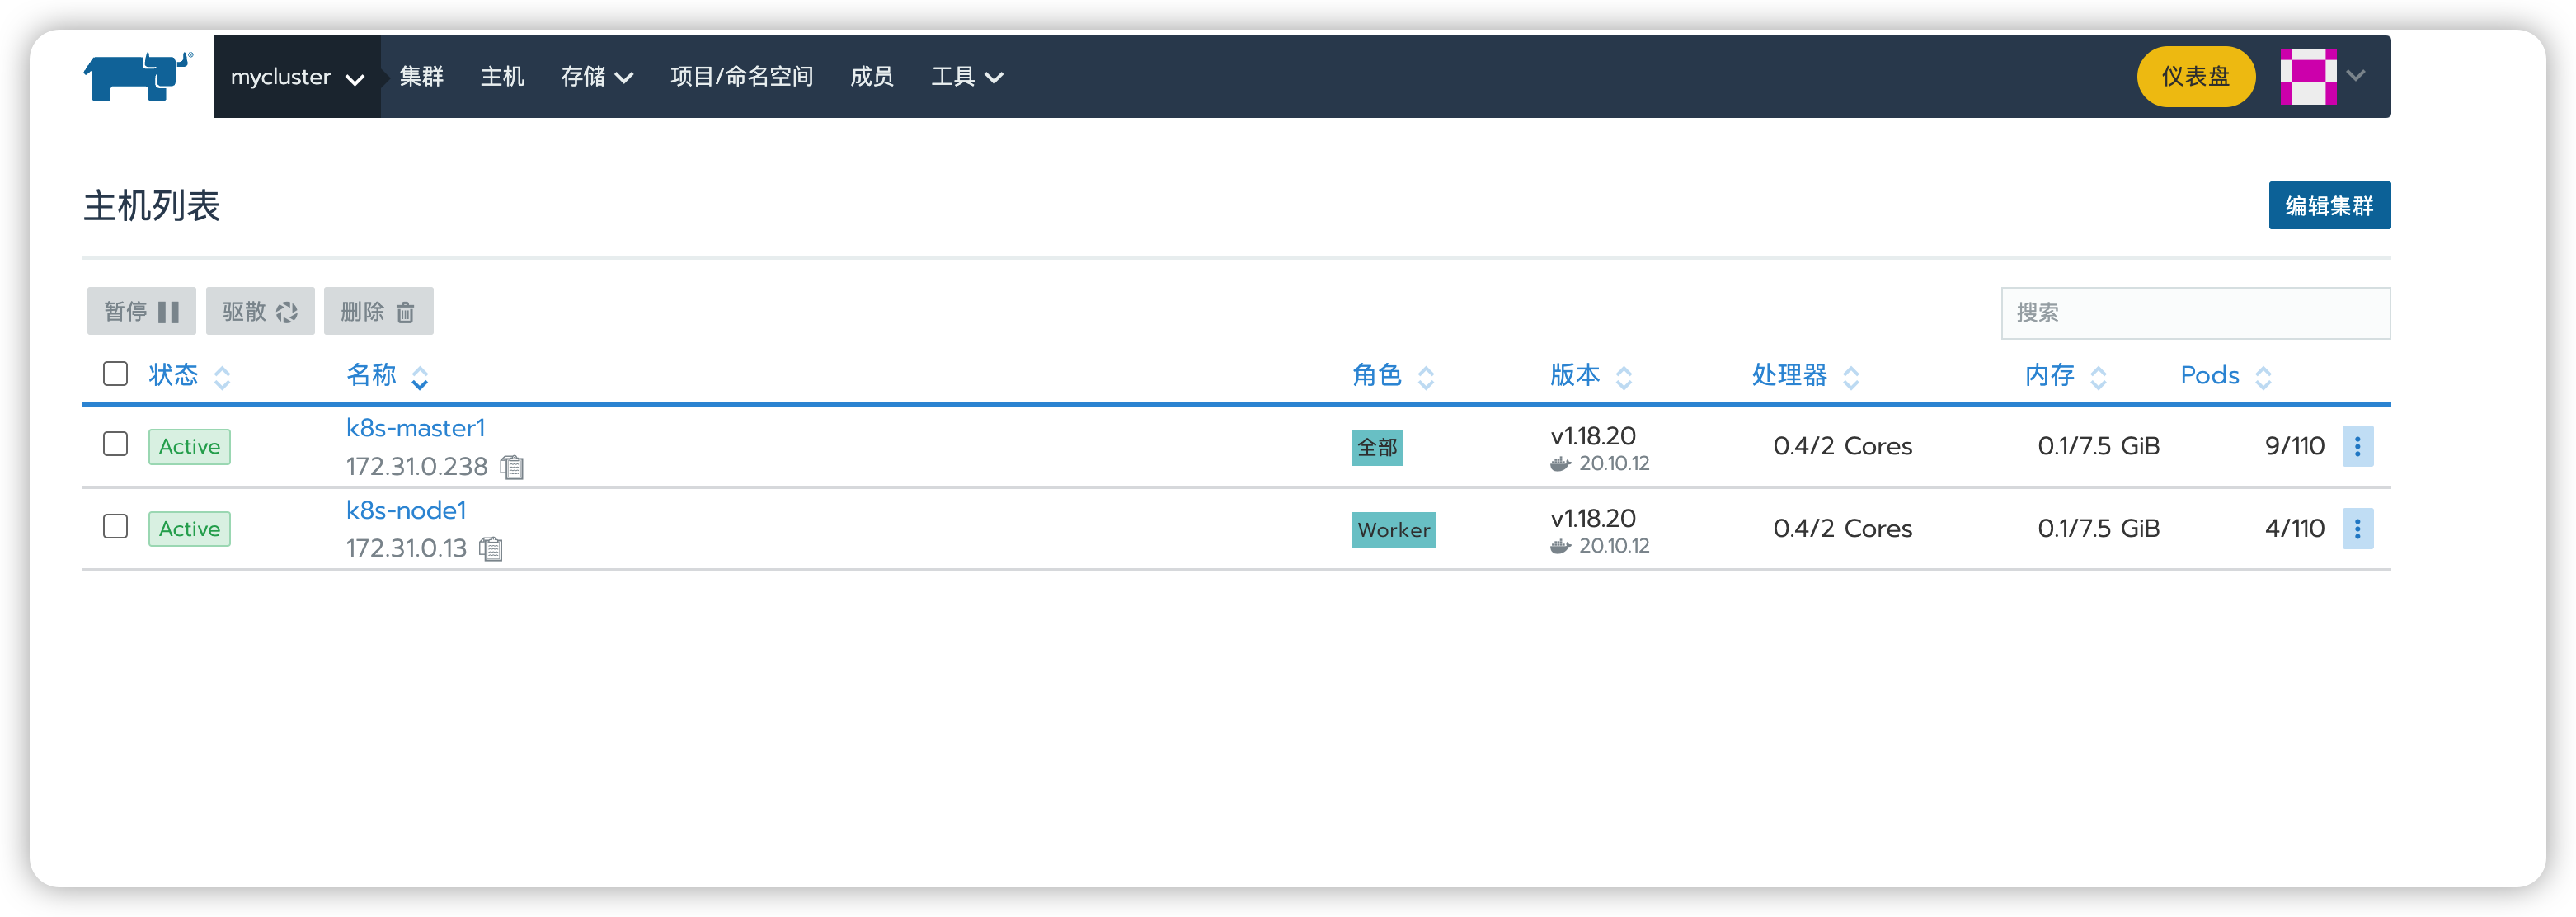
看到一个明显的active就代表可以了。

我这还是有点警告内容的,磁盘压力大,看来还是虚拟机不得劲。
如果正常情况来整,你会看到主机有 3 个绿色的active状态即可。
注意
不要使用端口6443,这应该是K8S API会调用的端口,否则会提示6443端口占用。
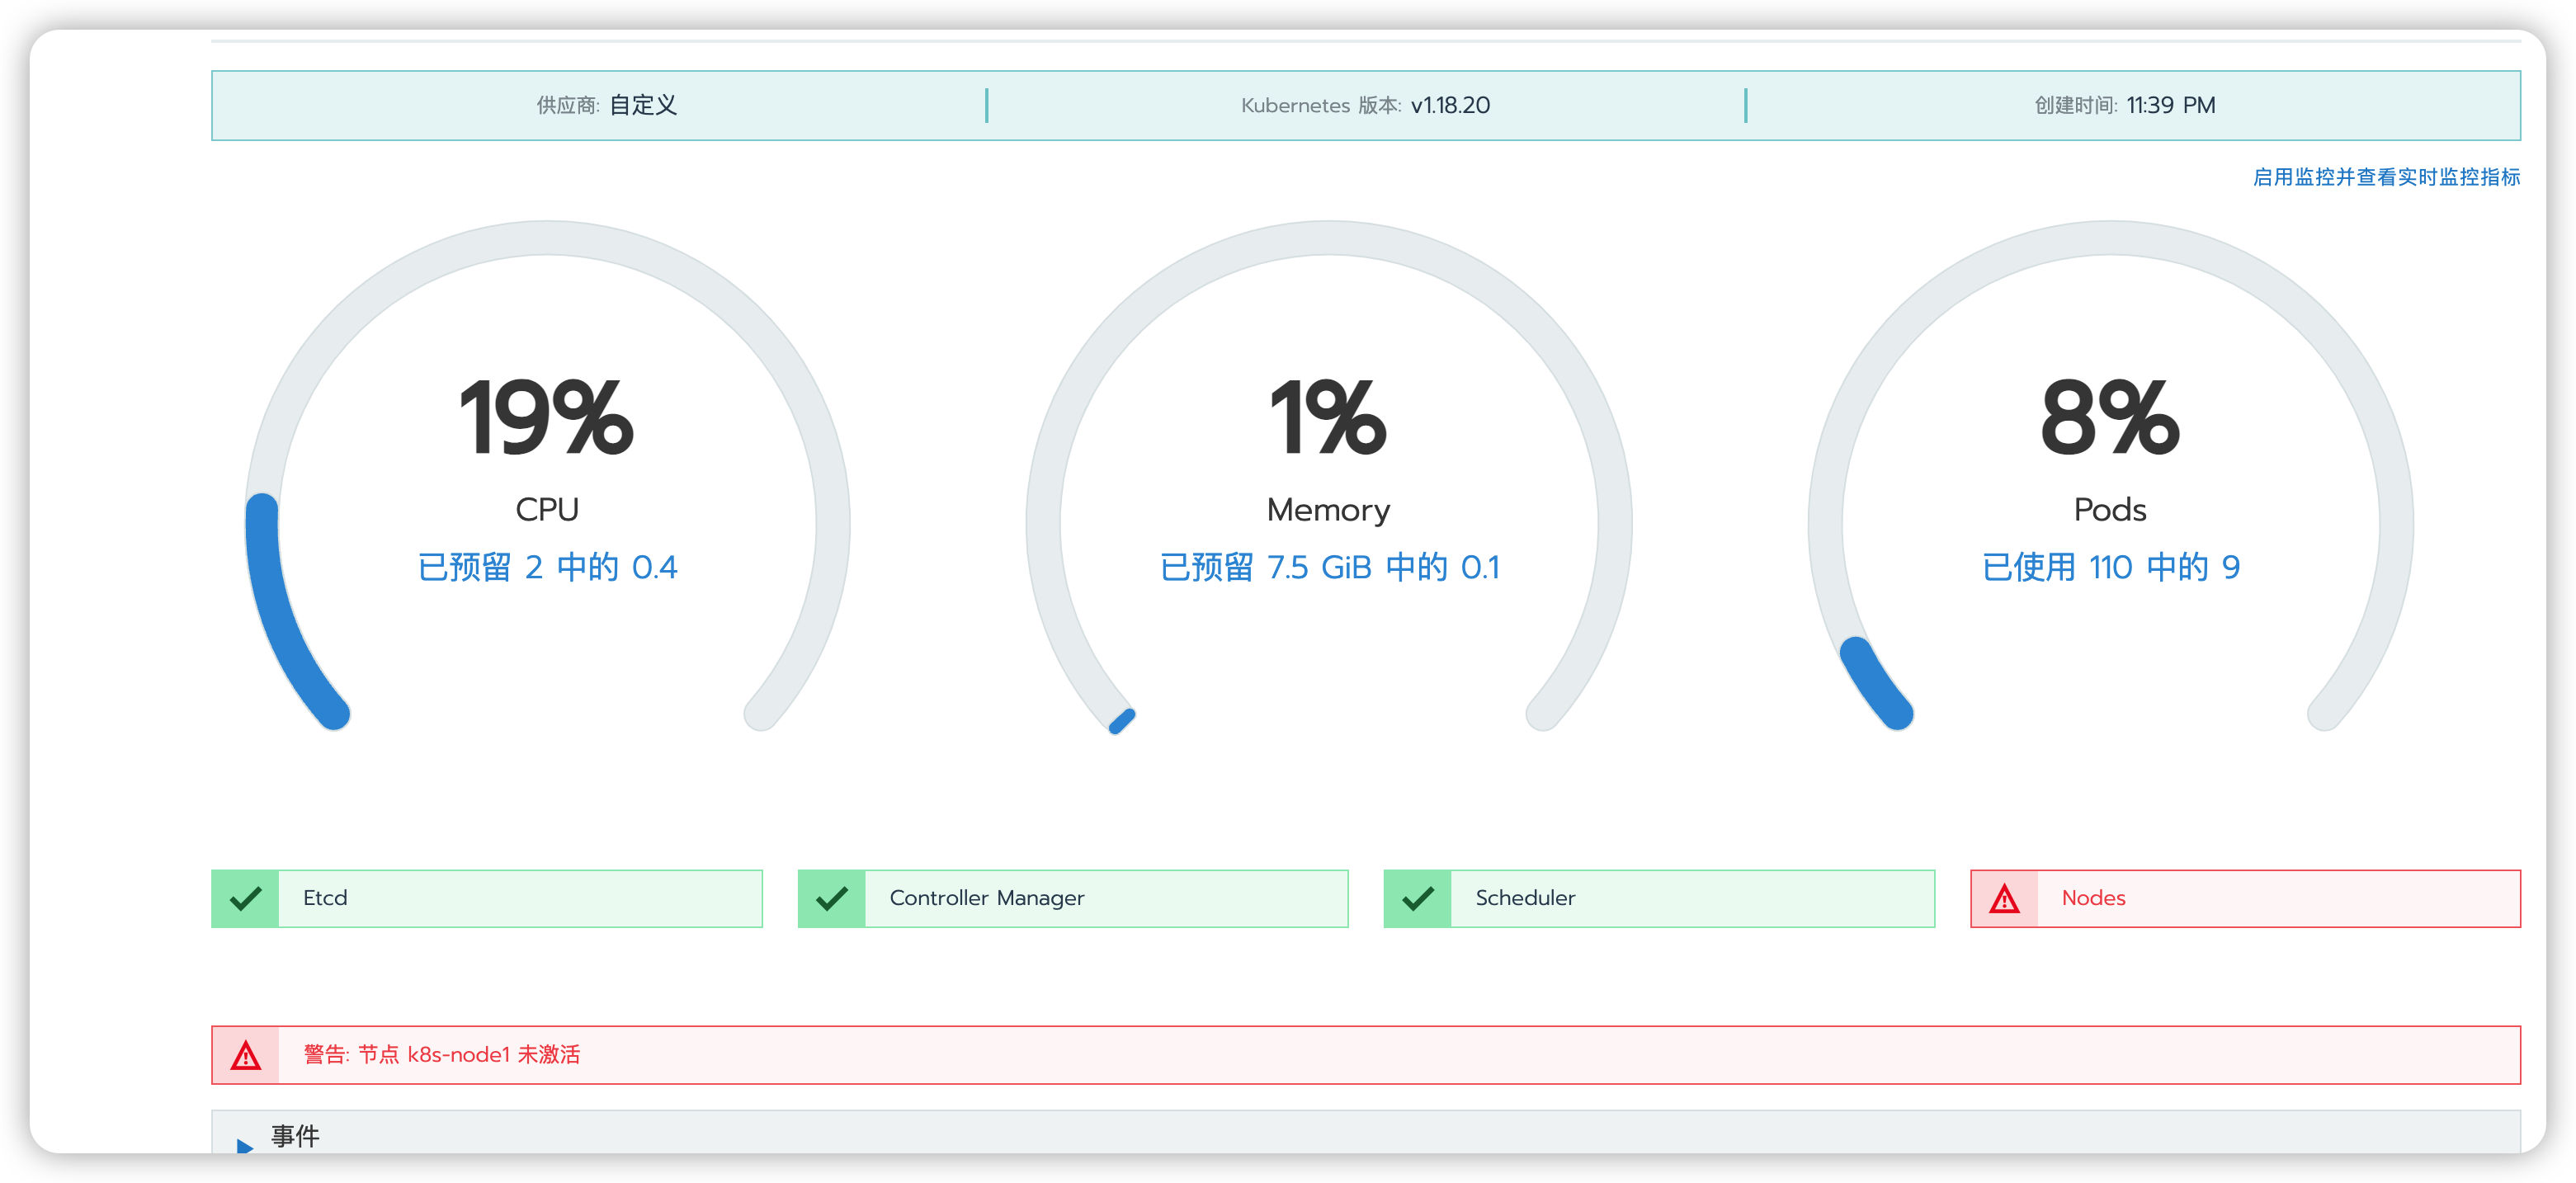
这边提示k8s-node1还没激活,再继续等一会,它还没注册完。
就算出现
Runtime network not ready: NetworkReady=false reason:NetworkPluginNotReady message:docker: network plugin is not ready: cni config uninitialized这个也不要惊慌,继续等,最终会变成Active